|
The following instructions are regarding how
to modify the intake in a cheap, but very useful way, in order to gain a
better throttle response and additionally gain a few Newton-meters for “free”.
This guide is applicable for most cars and
more precisely Peugeots, but it has been written especially regarding the 206
in combination with the 2.0 GTi engine. Since at this date (2003-11-12) the
206 RC/GTi180 had not been introduced officially and the airbox is different
in shape, I have no clue if this guide regards this particular version. I
know for sure though, that this guide is not
applicable for the 206 with a 1.4 HDI engine, since on that engine the airbox
is at another place and is of another shape.
First a little intro about the theoretics and
practical how’s and why’s I went into this direction.
The reason why the Peugeot engineers (and
trust me: they are not stupid and they do know what they are doing!) made the
intake like it is originally is simple: comfort: to prevent engine intake
noise and its vibrations to enter the interior. The downside is that it did
cost a bit of torque.
When doing the modifications described in this
“How To” will make this intake noise and vibrations come back again a bit,
along with a better pick-up from idle. Fine! That’s where I was after: better
pick-up!
There were a few standard options I tried
before this home made version:
I tested the K&N Generation two, Green
Twister, Pipercross and they all perform reasonably,
until the temperature under the bonnet rises, especially when the fan kicks
in.
In that case under the bonnet the temperature
can go all the way up to 68 degrees when the car’s standing still. I measured
these extremes with an outside temperature of “only” 30 degrees and a tarmac
temperature at a cosy 42.
I was surprised too reading those figures, but
came to a simple conclusion: no Direct Intakes (open filters) under the
bonnet (even with Power Blankets or Cold Air Ducts), since that’s throwing
away power.
And they all did that, but I was going for
drivability, not for power loss or loader intake sounds. They do sound
deeper, but made me feel a bit like a McDonalds
racer, to be quite honest.
If you’re after “under-hood appearance” and
“all show – no go” sounds, you don’t have to read any further, because...
I brought all
sets back (thanks to money back guarantee) and tried something with the
original airbox, since that’s obviously the coldest solution when driving in
warm conditions. Come to think of it: it’s logical the airbox is the best and
coolest place to filter under the bonnet, since A: it’s closed, and B: warm
air rises and the original airbox takes in its air from the underside of the engine bay.
Together with the fact that the airbox-intake
(Ø60) is (Pr2 à
3.14*302=) 2827.5mm2, the air filter itself has an area
of (c200x160=)
32000mm2 and the throttle valve (Ø50) only has (Pr2 à
3.14*252=) 1963.5mm2 makes the original stuff more than
sufficient. (See, the Peugeot guys aren’t so stupid after all!).
But a paper filter clogs pretty fast, so
that’s why I went for a K&N filter after all, but a panel filter in this
case (Item Number 33-2813).
See http://206gti.net/airfilter/
on how to change that. Hint: clean the filter every 5-10,000 km to keep it
“fresh”.
Another thing; I discovered during the
fiddling that the throttle, or better the butterfly, didn’t open all the way
and that’s obviously throwing horses away too.
Check out http://206gti.net/throttle-cable for
that solution, if necessary.
So, while the reason the intake air is taken
from out of the left fender area is clearer now, but problem with that
particular place is, is that it makes the way towards the airbox very long.
And together with the fact that it is padded on the inside, makes the Ø60 mm
hose very restrictive. The padding and the length decrease the actual usable
effective diameter, due to swirling.
You want a guess? Ø50 effectively? About the
same diameter as the throttle valve. This creates a under pressure in the
intake, before the throttle body while accelerating from idle.
Hence; poor response. Aha!
Secondly the near the fender (and especially
under it) is a hot place in warm days combined with some heavy-duty braking.
It can get very hot under there; about 50 degrees! This time resulting in
useless power loss, the same you get with Direct Air Filters, mounted in the
engine bay!
So, if you don’t mind some intake roar
(probably not! J), get rid of it and replace the intake hose with a large diameter
flexible alloy Ø110mm ventilation pipe from a DIY home improvement shop (a
flexible ventilation hose).
Sure this spiralled hose creates swirling too
and sure; the bend and length is also restrictive, but if you want a guess
here too; I give it the same in percentage as the OEM hose, 83.3%. That means
in this case a 76.4mm effective diameter. Nice; bigger than any diameter in
the intake! Suits me fine!
So, what about head-on in the wind; that’s the coolest and I get an extra free “turbo-effect” boost?
Well, I tried that, but that doesn’t really
give any measurable profit; actually it only creates a leaner air-fuel
mixture and successively (two oxygen sensors in the exhaust!) freaks-out the
ECU at speeds over 170kph! Simply because it can’t handle the over-pressure
of the air coming in. There is a MAP sensor mounted in the intake manifold,
but it can only measure under-pressure
(vacuum), no over-pressure (boost).
OK, I needed to find a cool non-pressurised
(neither over, nor under) and I decided in the corner behind the bumper is
the best and coolest place (measured!) and not really that far from the airbox.
So much for the intro.
Start off with removing the air intake with
this guide: http://www.206gti.net/intake/,
but leave the airbox out, the airbox support in and leave it as it is for
now.
Click on the images to enlarge.
|

|
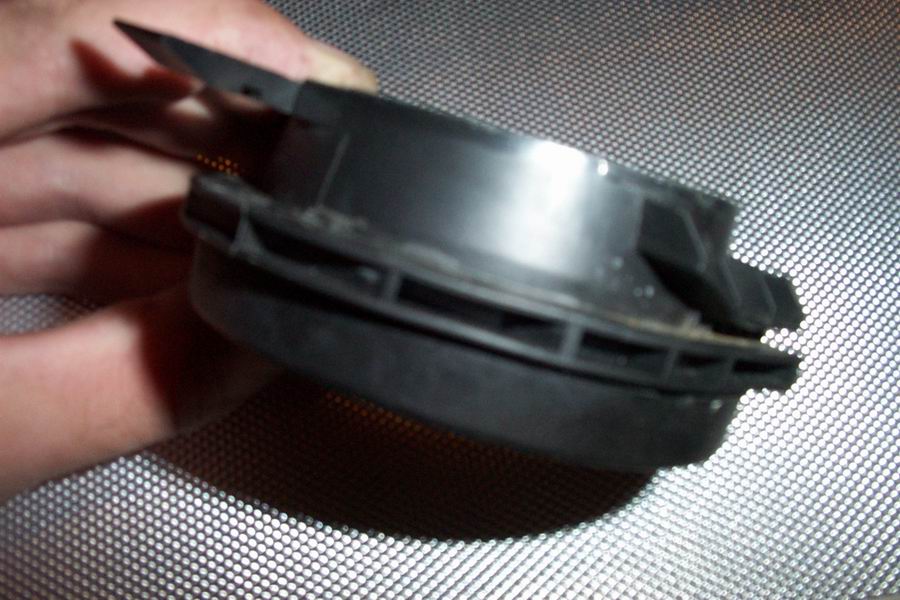
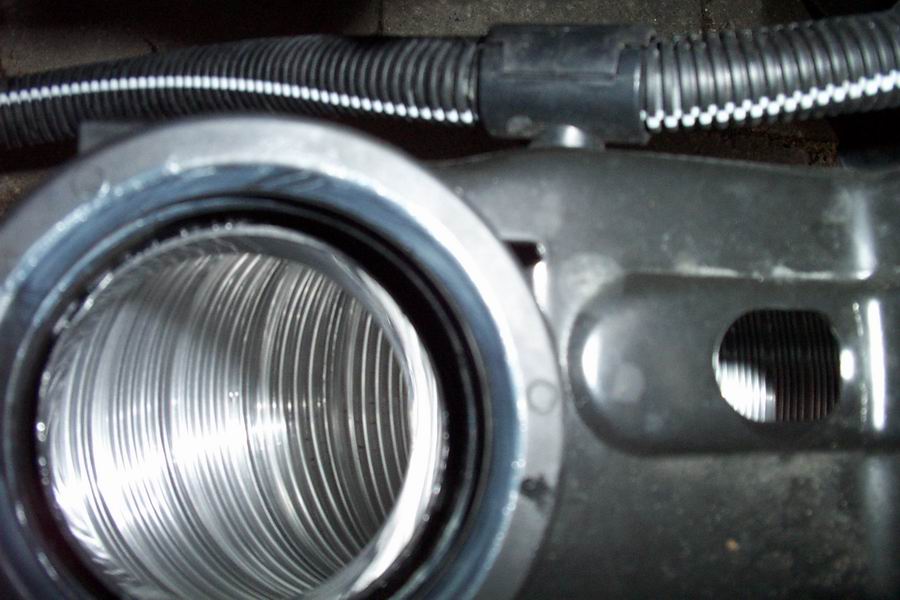
1.
As you can see, I
already started to take things apart. The duct ends at the airbox side with
a tapered plastic ring with a rubber seal. I wanted to maintain that order
to leave everything as original as possible. This way the airbox is still
easily removable.
|
|
|
|
|

|
2.
Start off by cutting
that plastic ring neatly and straight in half, just over the clip which is
holding it on the iron airbox support (Sorry for the blurry pictures, it
was the background that the camera couldn’t handle) …
|
|
|
|
|

|
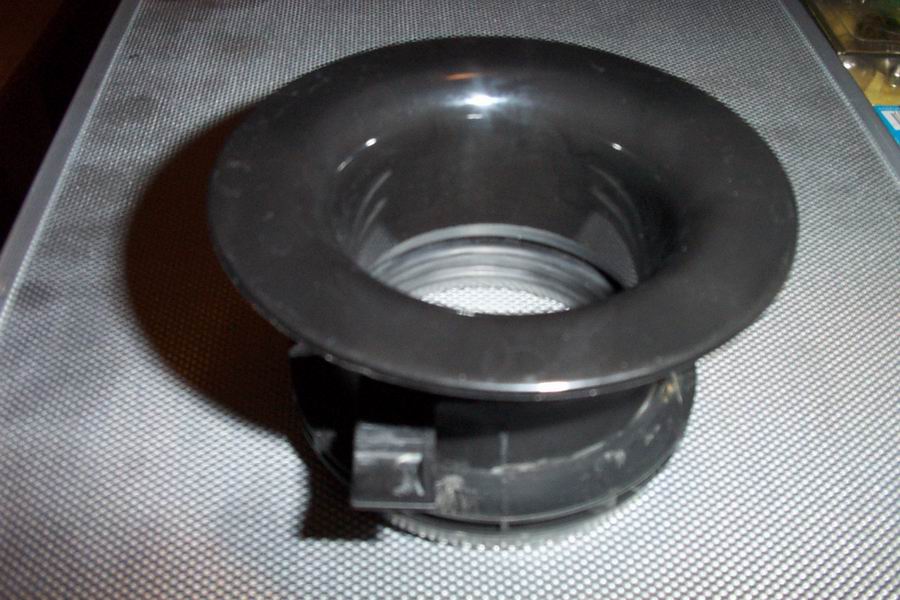
3.
… until
you have this left. As you can see; some parts need to be cannibalised in
order for other parts to remain original. I chose the air intake to be
eaten…
Since the ring was tapered from Ø68 towards Ø60mm, so cut halfway the
hole is now about Ø64 to Ø63mm.
|
|
|
|
|

|
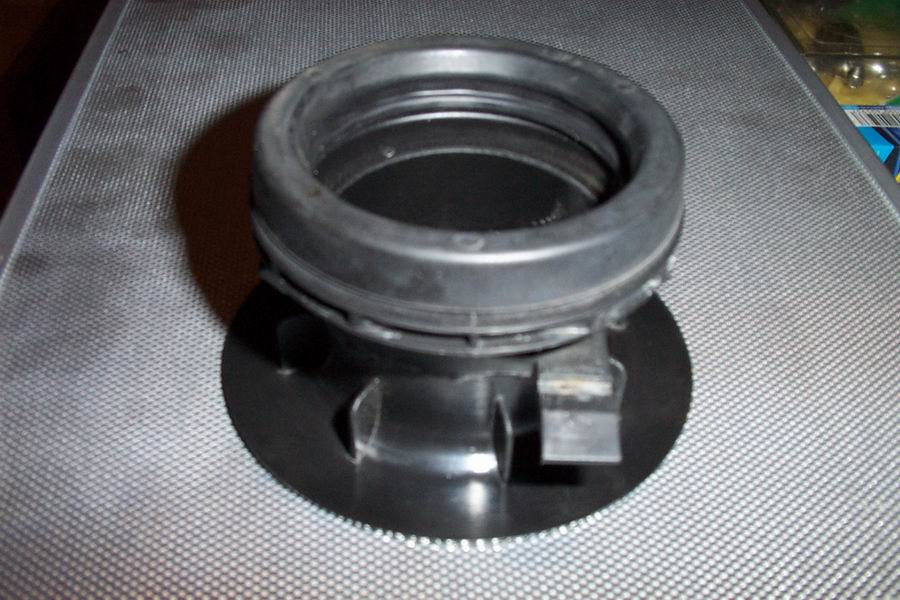
4.
Now it’s time for the
big trick. How to connect the big Ø110mm flex-pipe to the Ø60mm plastic
ring: get a bass ventilation-port made for a subwoofer! Ideal in flow and
an ideal adaptor. It can probably be bought at you local speaker dealer. I
did!
Be careful it’s not too long and has a wall thickness of 1.5 – 2mm.
I cut the funnel down until it was exactly Ø60 inner diameter (it tapered
from Ø70 to Ø55mm) and shove it in the Peugeot part you just cut down.
|
|
|
|
|

|
5.
Be sure to buy (or
grind down) the funnel at the wide end, so in fits in the Ø110mm flex pipe.
This it how it looks in the position it will be fixed in the car...
|
|
|
|
|

|
6.
.and this is how it
looks from the side. Test the length by putting it in the car and put the
airbox in its place. I made the two diameters hit each other just, creating
a perfect Ø60mm passage between the inside diameter of the bass-pipe and
the inside diameter of the airbox intake.
|
|
|
|
|
|
7.
After adjusting the
funnel so that it leaves no gap between the two diameters, measure the
height and take the airbox and the “adaptor” out of the engine bay. Take
2-component glue (or a good glue pistol) and glue the two parts together at
the measured dimension. Give it time to dry and test if it is *really*
secured!
|
|
|
|
|

|
8.
At big step has been
made on this picture (the bumper is taken off for a better view): Put the
“adaptor” in the bottom of the airbox support. Now bend the flex-pipe in an
as short as possible radius (so it’s not the lowest point of the car). Push
the hose over the funnel about 15 too much and secure it with a large
diameter jubilee clip. Fold down the remaining hose over the back of the
funnel.
|
|
|
|
|

|
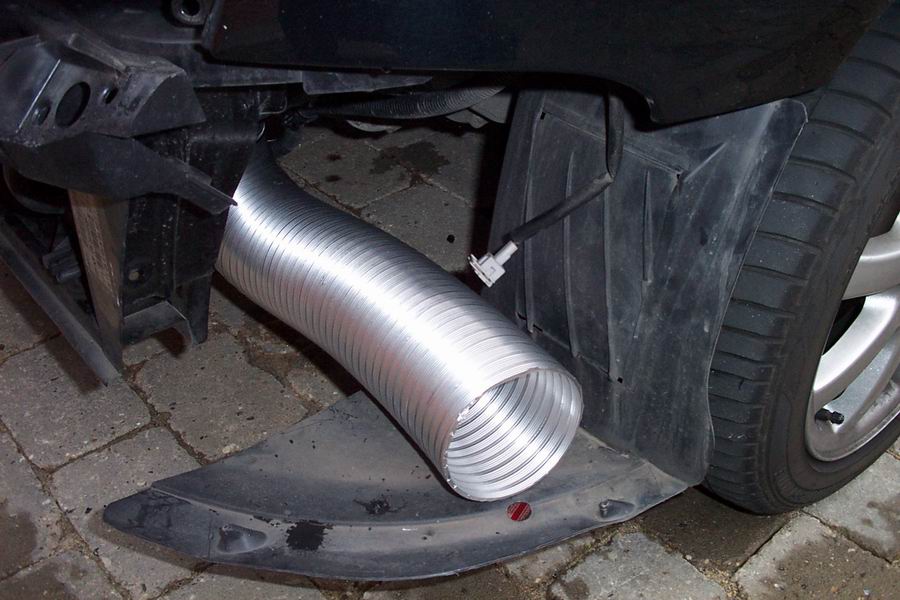
9.
Without the removal of
the bumper the next is a fit of a fiddle but it’s do-able.
Roughly cut down the pipe until it’s about coincident with the
outside of the LH tyre. Put the inner wing (or mud guard) back inside the
bumper and fender.
|
|
|
|
|

|
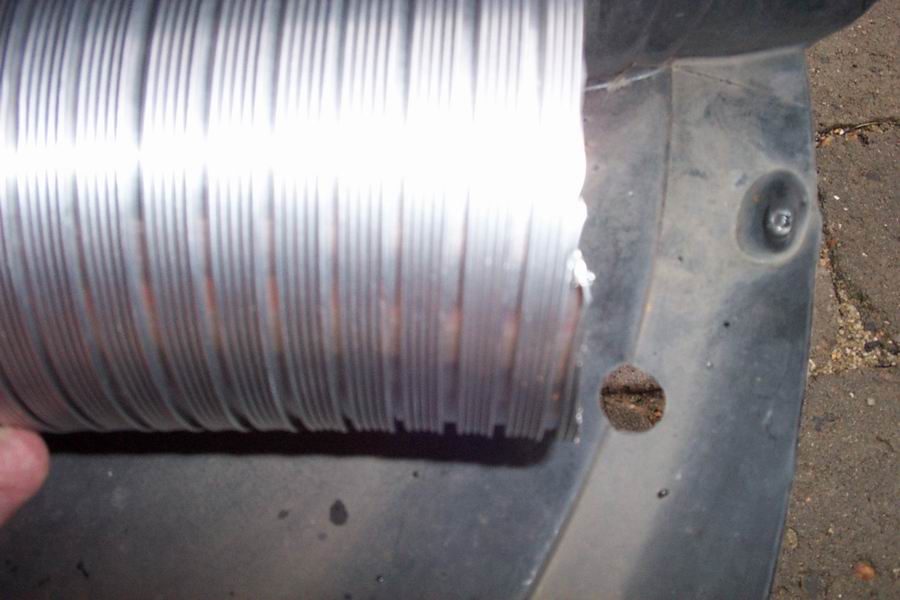
10. Cut the pipe again down so it does not pass the little hole in the
bottom of the inner wing (see picture). This hole is used to adjust the LH
fog-light and at the same time a perfect guide to have enough clearance
between the bumper and hose (about 60 – 80mm). PS. one can put a Ø110 id funnel here too, I can’t find one this big!
|
|
|
|
|

|
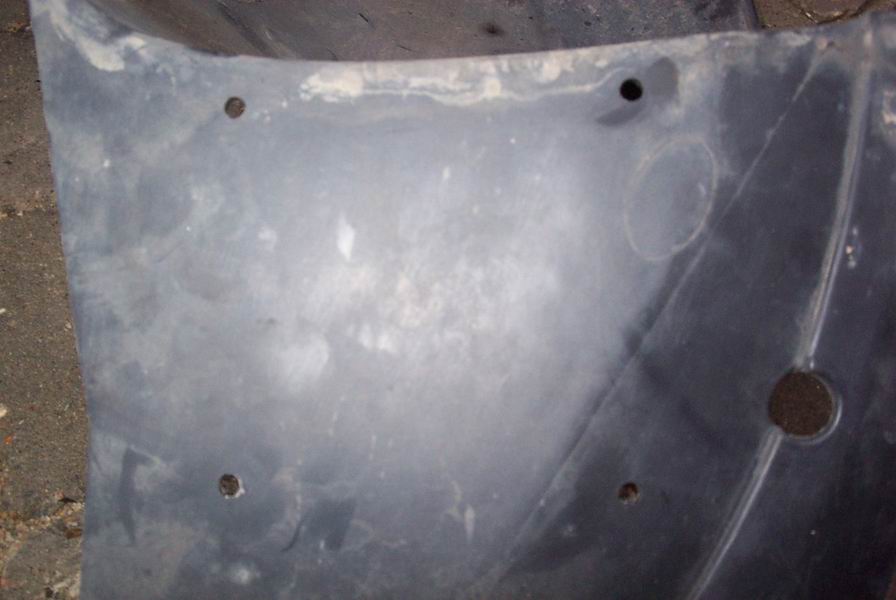
11. Drill 4 Ø6mm holes in a 120mm square pattern starting at 15 mm
off-set from the upwards edge and about 60mm from the curved edge, so the
two outer ones are about 50mm passed the previous mentioned adjustment hole
(see picture).
|
|
|
|
|

|
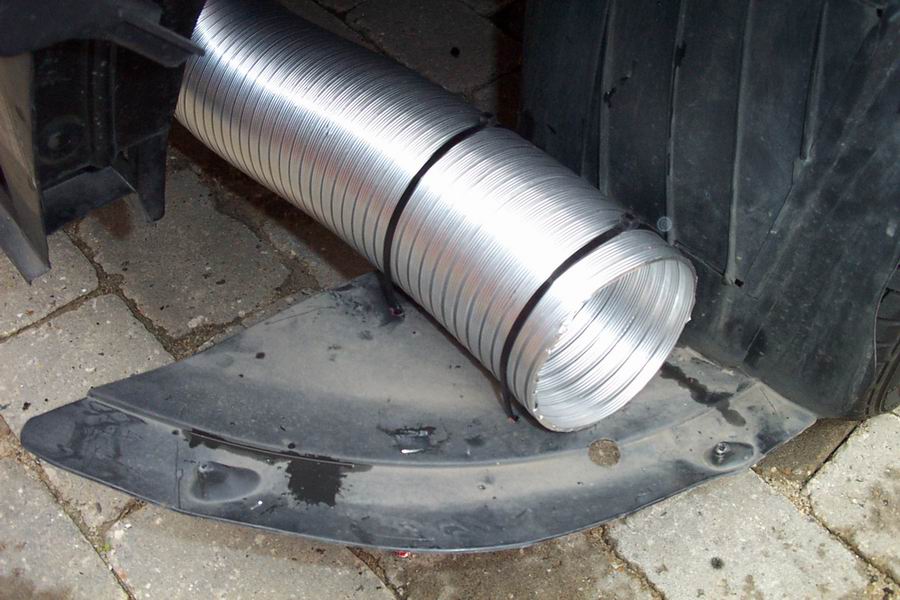
12. This is how it looks when the pipe is fixed to the help of 2 long
(or four shorter) tie-wraps. Wiggle the inner wing in its place and mount
it in its original position. Don’t forget to re-connect the fog-light
cable!
|
|
|
|
|

|
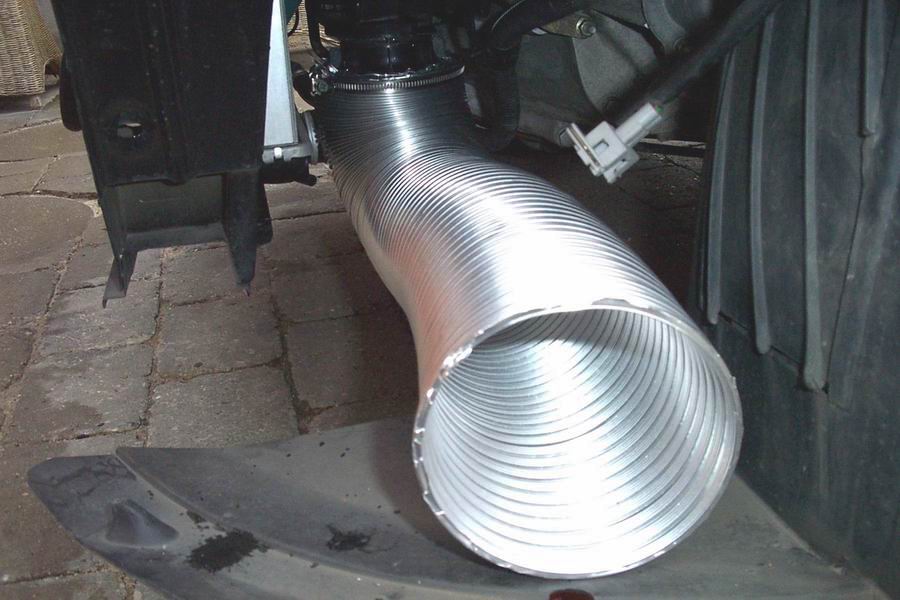
13. So, this is how it looks on the other end in the engine bay. Note:
if the hose is hitting the power leads, bend the iron hook towards holding
the lead towards the centre of the engine bay, so the lead pipe goes around
the aluminium hose. If they hit, it can cause a hole in the pipe and
resonations under load.
|
|
|
|
|

|
14. Put some White Grease on the 3 rubber parts of the airbox and
put it back into place (I know; the picture only shows the air
connection…), re-connect the flex hose (on top towards the throttle-body)
and secure the jubilee clip. That’s all.
|
|
Give
the engine, or better: the ECU, a few days to accommodate and adjust to the
new intake and filter. Once it’s adjusted the engine picks up like it
should all along, together with a nice soft roar, enough to distinguish
it’s a GTi.
Epilogue:
|
|
|

|
A.
For your information:
here’s the Ø50mm throttle valve, with over it the “half moon” section for
idle running. A stepper motor controlled valve connected to the ECU
regulates the airflow through this canal.
|
|
|
|
|
|
|

|
B.
I even took the time to make a fibreglass Peugeot
Sport 206 Super1600 bottom part copy of the airbox with a 110mm intake
K&N panel filter and top half narrowing from Ø90 to Ø60mm), but without
a 220HP 10,000 rev rally engine and apart from giving a lot of roar it
doesn’t do anything more than the above modification. It’s just a
time-consuming and expensive mother to fabricate. I tossed it in a corner
(since I didn’t look at aesthetics, only functionality, it looks like
crap), but I can still feel the fibreglass itching in my arms J…
|
|
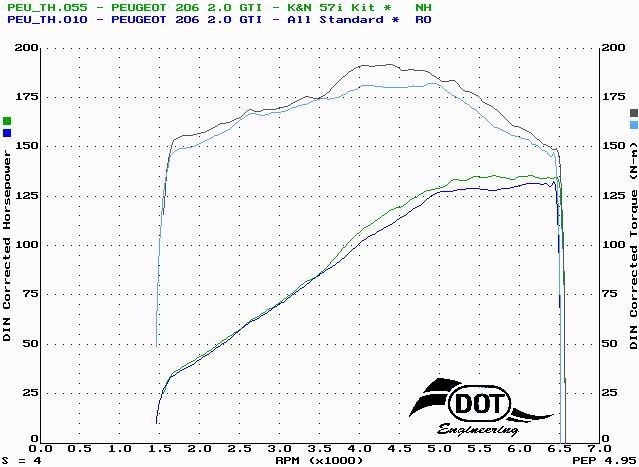
The gain from original: 12Nm at 2800 (only from idle to full-throttle,
due to the absence of vacuum in that case) and a handful horses at 5800~ in
cold *and* warm conditions (due to the K&N filter). I clocked my car (206
SW GTi going 4kph faster (now 225 on the speedometer) in
combination with German Shell Optimax (RON102).
All in all it took me a couple of months but I think it was worth it.
Done in practice, no guess-work on paper or from hear-say. And again, the
(highly over-exaggerated) gains claimed by the different direct induction kit
manufactures is mostly due to the removal of the restrictive intake hose and
a freer flowing filter material, but has nothing to do with their overprized
kits in particular.
To give you a example: a K&N Generation II Direct Injection costs
a whopping DKK 3.743,75 (€506,-) !!!
You do the math…
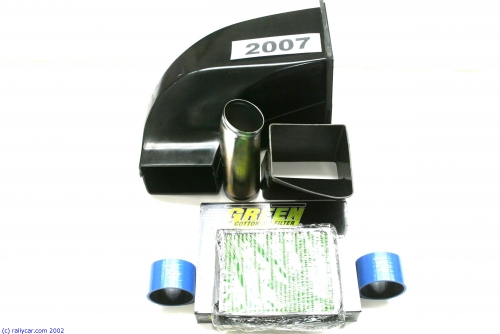
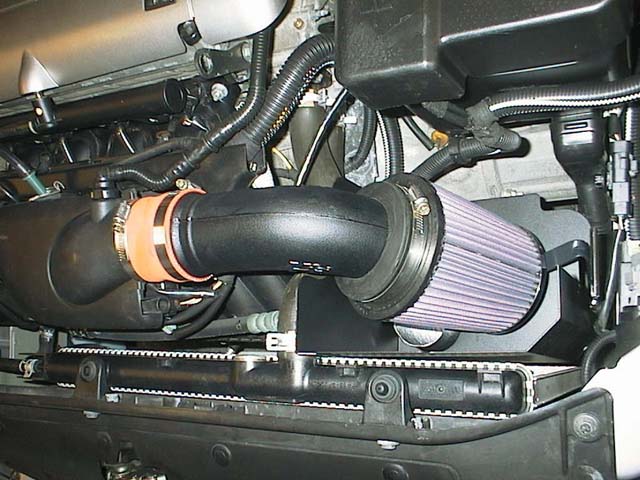
Still interested in a bolt-on direct injection kit?
K&N info; see: Kit, Kit fitted, and Graph.
Taken from http://www.dot-e.dk/dot-e.dk/katalog/knkatalog/autoKNnum/view
(Use the pull-downs to end up at Peugeot, 206, 2.0)
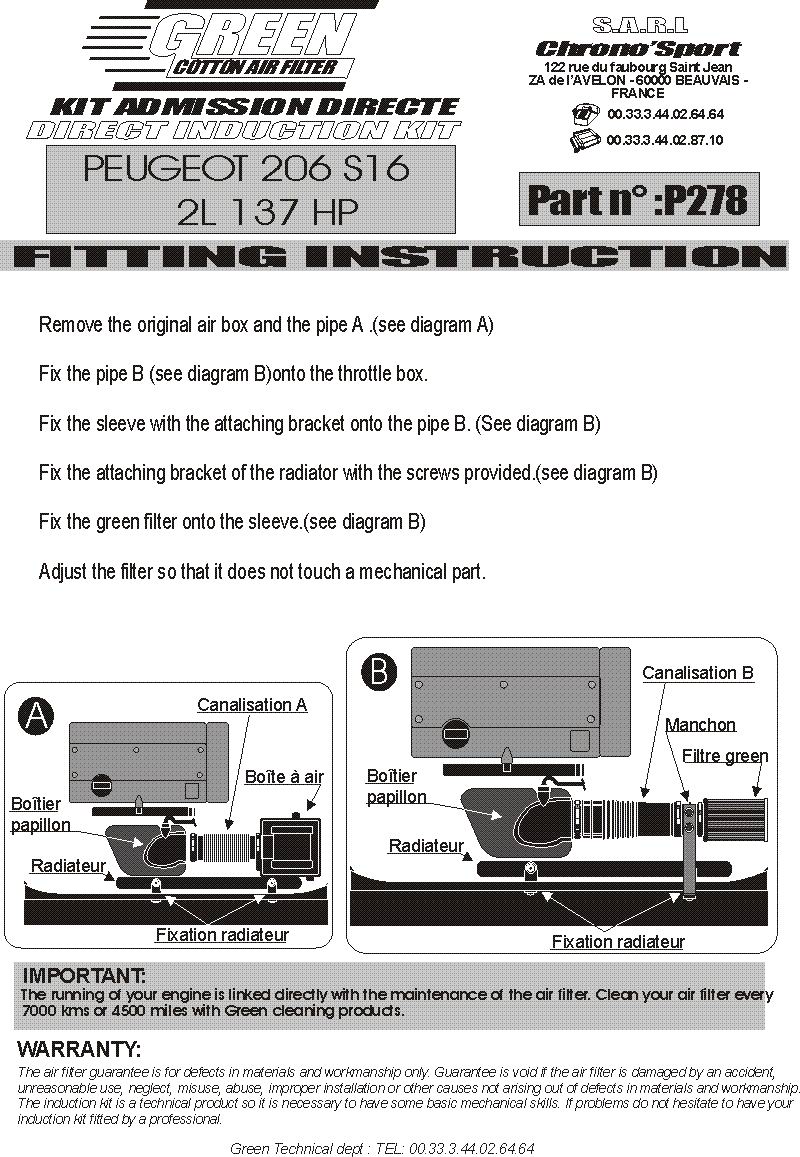
Green Info; see Fitting
instructions
Taken from http://www.needforspeed.co.uk/green/index.htm
Pipercross info: http://www.pipercross.com/Apps_P.htm
Van
© 2003-11-12, The Peugeot 206 GTi page. http://206gti.net
|


