The following
instructions should help you replace the rear speakers in your car.
All my instructions and illustrations are based on a Apr 2000 build 206 GTi. To the best of my knowledge, these instructions are still current for all following models, including the current one.
The speakers currently fitted are made by Goodmans in the UK, are rated at 20 Watts (4 Ohms), and are 5 1/4" or 13cm in diameter.
Click on the images to enlarge.
|

|
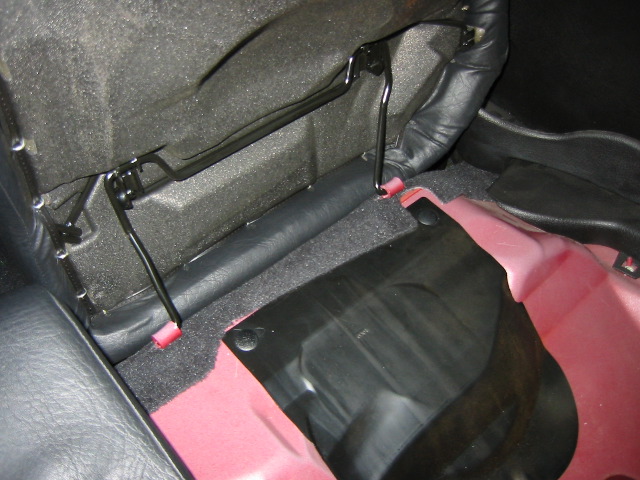
1. We’ll start by removing the lower portion of the rear seats. This is a very simple operation as they are only secured by some reasonably stiff springs into 2 rings welded to the floor pan.
|
|
|
|
|
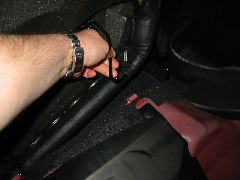
2. Flex the springs inwards like so and the seats come out. Put them in a safe place :-)
|
|
|
|
|
3. Now we need to take off the seat backs. You can probably get away with not doing this but it makes the job much more difficult, and they are only held on by 2 bolts each. There is one bolt on each side under the carpet accessed from the boot.
|
|
|
|
|
4. And 2 bolts in the centre which secure both halves together. The Driver’s (or RHS) comes out first, followed by the passenger or LHS. You will see that the bolt holes are elongated, but there are spigots on the floor pan at the bolt holes so the seats can’t be adjusted anyway.
|
|
|
|
|
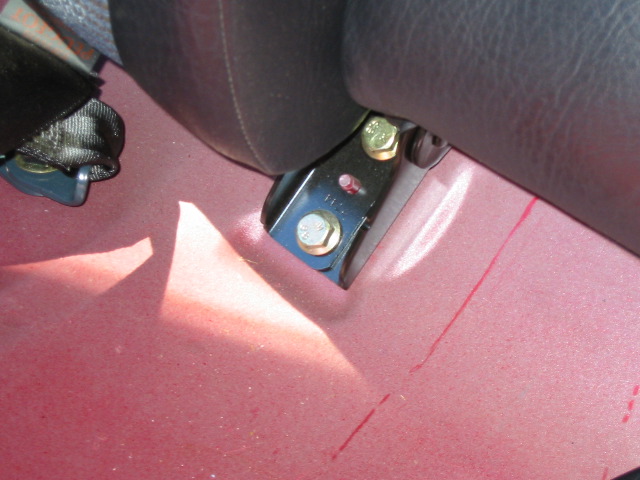
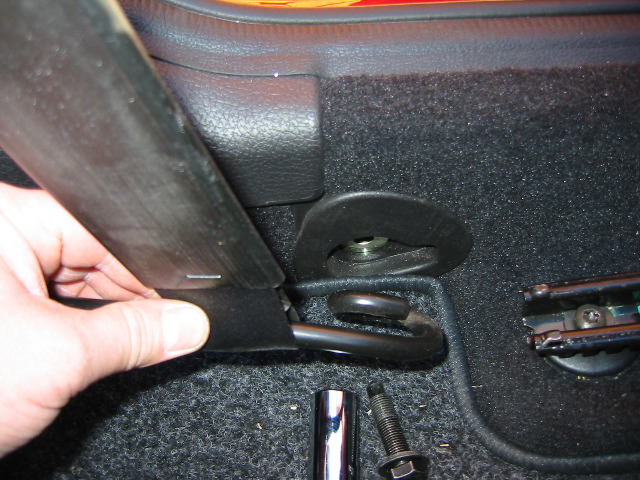
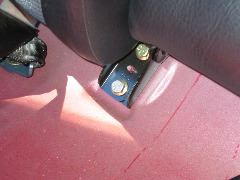
5. Now we unbolt the lower rear seat belt anchor point. It’s a single large bolt with a spacer under the seat belt anchor - one on each side.
|
|
|
|
|
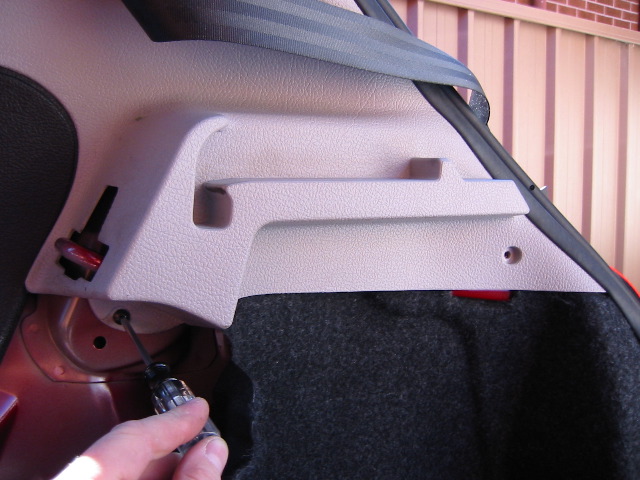
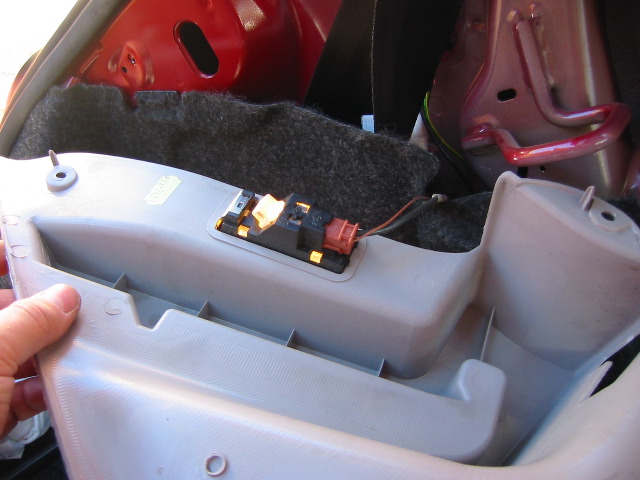
6. Next up is the white or light grey panel at the back which the rear seat belts go through. There are 2 Torx screws - one at the back and one at the front (with my screwdriver on it). It is then secured by a number of clips mounted behind the panel and it may also be helpful to pull away some of the rear window seal as well. As per normal Peugeot routine you have to tug on the panel till the clips let go. Once that it is done you can withdraw the rear seat belt through its cutout and remove the panel completely.
|
|
|
|
|
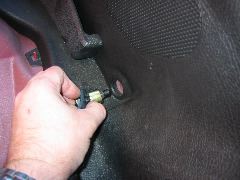
7. On the driver's (or LHS), the courtesy light must be unclipped before completely removing the panel.
|
|
|
|
|
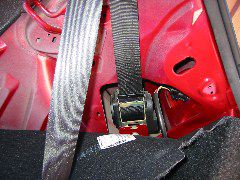
8. Pull the carpet right back and you can see the rear inertia real seat belt and the connector for the rear brake light cluster.
|
|
|
|
|
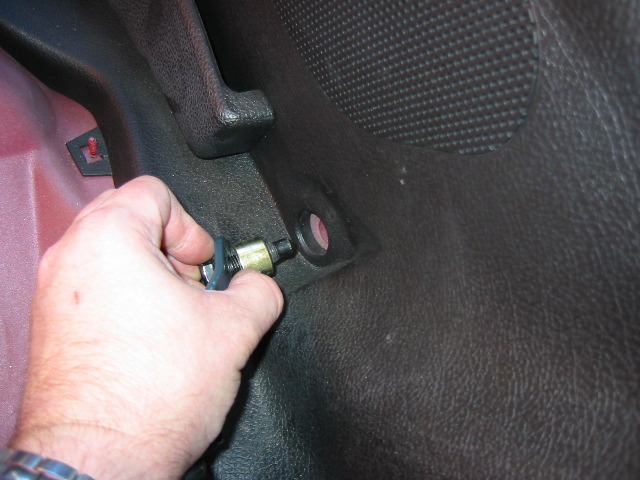
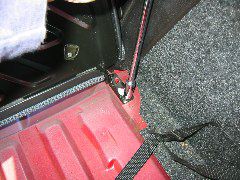
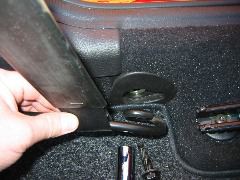
9. Unbolt the front seat belt lower mount bar at the front. It is the same size as the rear belt anchor. To make things easier you can pull the belt right off the bar through the curled section. There’s no need to remove the bar completely, but you can see in the photo that there is a small section of the main side panel secured behind the front belt mount bolt plastic shroud. Note also that the front bolts have the same spacers as the back ones, hidden behind their little plastic shroud.
|
|
|
|
|
10. Unclip and remove the rear panel side pockets. They should just lift up and then pull away.
|
|
|
|
|
11. Prize the rear window seal away from the sections covering the panel. They can be snug but they are not glued to the frame at all.
|
|
|
|
|
12. Do the same with the rear part of the front door seals as well.
|
|
|
|
|
13. Now we can attempt to remove the main side panel. It’s a large panel and has to be flexed a bit in order to remove it completely. Be gentle but firm with it, but it is a reasonably strong panel :-)
|
|
|
|
|
14. It’s clipped in a number of places but be careful not to pull out on the very front top section where it tucks behind the panel covering the B pillar (front seat belt upper adjustable mount) as you could break the tabs holding it under the panel above. That is the last bit to be removed.
|
|
|
|
|
15. Once it is all unclipped, you need to pull the bottom of the panel above the spigot at the bottom of the panel and then grab from the bottom of the panel and pull inwards towards the centre of the car. A fair bit of flexing is required to get the bottom to rotate out, but once done you can remove the front forward section from the B pillar tabs holding it relatively easily. Sorry, this is a 2 handed operation so I couldn’t take photos :-) After this I merely rotated the panel around and left it in the front door area (the seat belt still goes through the panel).
|
|
|
|
|
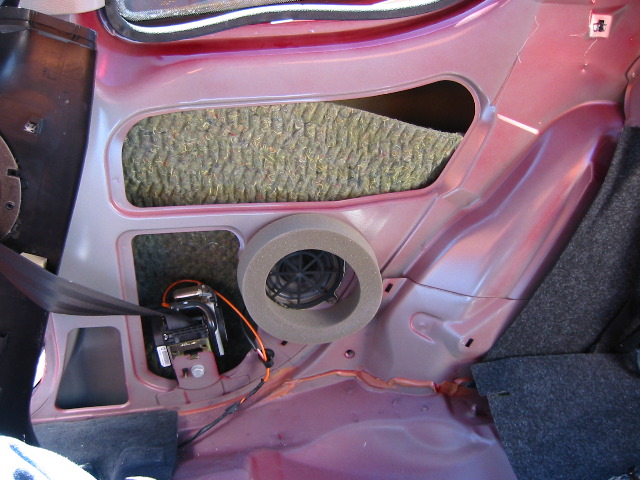
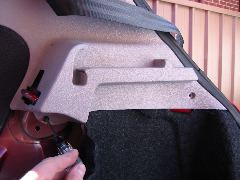
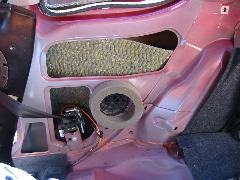
16. Congratulations, you have gained access to the rear speaker area! Note the pathetic and completely unsecured excuse for sound deadening hiding in the panel cutout behind the speaker. It is a great time to remove this stuff and put some of your own sound deadening in if you want to, but this is optional. At any rate, put the original stuff back in too. I taped it more securely in place with some gaffer tape.
|
|
|
|
|
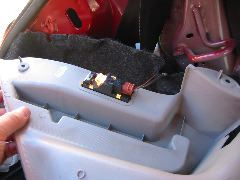
For info, the bright orange wire going to the seat belt reel is the pretensioner. Don't mess with this wire, as it is attached to a pyrotechnic device and could be rather expensive to replace.
|
|
|
|
|
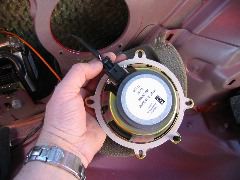
17. The speakers are a 5 1/4" or 13cm Goodmans brand (made in the sunny UK), capable of a massive 20 Watts (according to what’s written on them). To remove them it's simply a case of peeling back the grey circular foam, and undoing the 4 torx screws securing them. There is also a small plastic clip at the top holding the whole thing to the frame, and a simple electrical connector on the bottom.
|
|
|
|
|
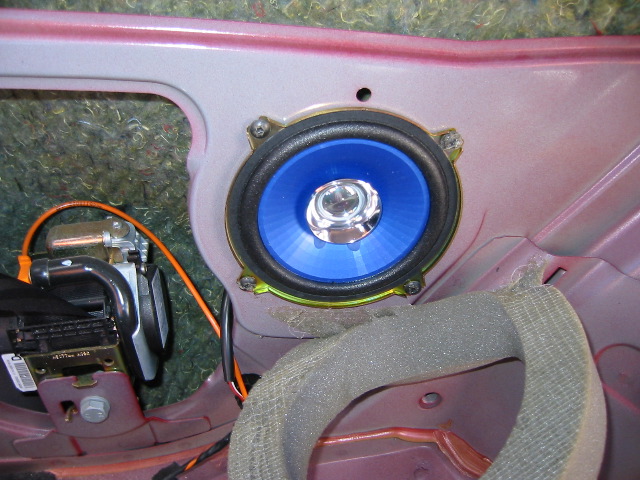
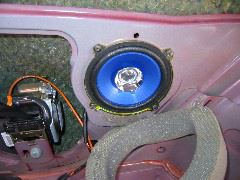
18. My Pioneer TS-G1317 13cm speakers fitted perfectly in the original holes. No drilling required! These are relatively cheap dual cone speakers (120W rating) but as I have larger and better quality Pioneer 16 cm (6 1/2") splits in the front, these are fine for "fill-in" speakers. I’ve never been a fan of having thumping 6 x 9s way out the back when I'm sitting in the front, but each to their own :-)
|
|
|
|
|
19. As they say, installation is a reversal of the removal procedure. My only tip is, make sure the speakers are working properly before putting that side panel on again. You don’t want to have to remove it too many times.
|